
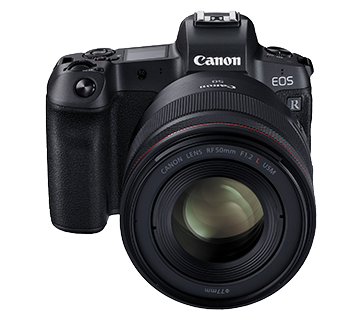
Connecting the Camera To a Computer Using a USB Cable (EOS R)
Solution
This section describes how to connect the camera to a computer when importing images to the computer or specifying the camera settings from the computer.
The interface cable that comes with the camera is IFC-100U, of which both terminals of the USB are Type-C. If your computer is not a type-C terminal, then it cannot be used.
Please refer to the computer’s manual for details regarding connection parts.
Use a card reader or Wi-Fi function to transfer photos to the computer. For details, see related information.
You can prevent the camera from turning off automatically when it is connected to a computer by setting the Auto Power Off to [Disable].
1. Confirm that the camera is not connected to the computer.
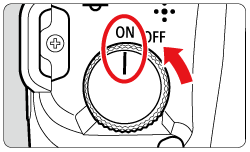
2. Set the camera’s power switch to < ON >.
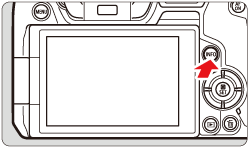
3. Press the < MENU > button to display the menu.

4. Press the < INFO > button to select the [  ] tab.
] tab.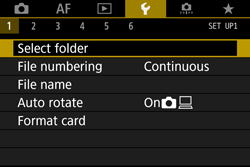
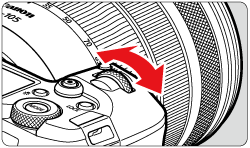
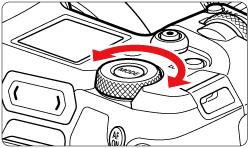
5. Turn <  > to select the [
  ] tab.
> to select the [ ] tab.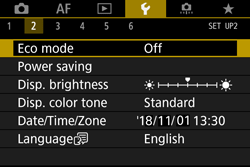
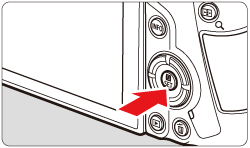
6. Turn <  > to select [ Power saving ], and then press < SET >.
> to select [ Power saving ], and then press < SET >.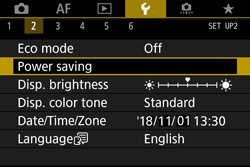
7. Turn< > to select [ Auto power off ] and press < SET >.
> to select [ Auto power off ] and press < SET >.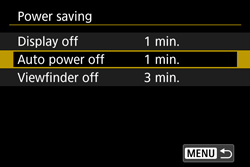
8. Turn< > to select [ Disable ] and press < SET >.
> to select [ Disable ] and press < SET >.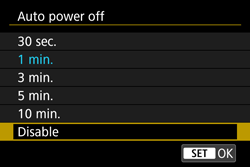
NOTE
Please refer to Advanced User Guide for more information about the Auto power off settings.
9. Press the < MENU > button to turn off the menu screen.
10. Set the camera’s power switch to < OFF >.
Use the provided interface cable or one from Canon. When connecting the interface cable, use the provided cable protector.
- Cable protector
Using the cable protector helps prevent accidental disconnection and terminal damage.
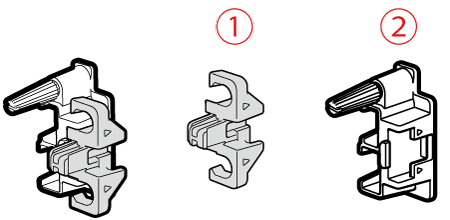
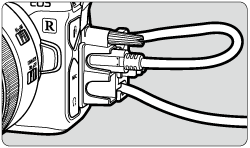
 Clamp
Clamp Cable protector
- Interface Cable IFC-100U (Approx. 1 m/3.2 ft.)
This cable is included with your camera.

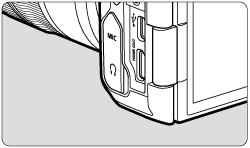
1. Open the terminal cover.

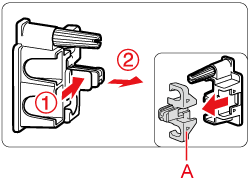
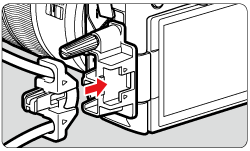
2. Remove the cable protector clamp.
A: Clamp
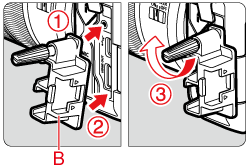
3. Attach the cable protector to the interface terminal area of the camera.
B: Cable protector
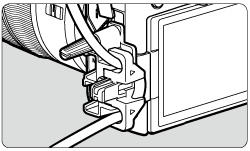
4. Run the cable through the clamp as shown in and .
and .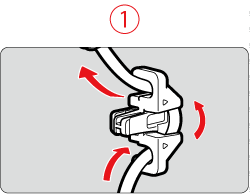
5. Next, attach the clamp in the location shown in the figure below.
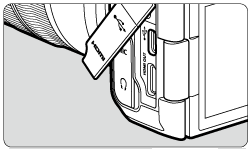
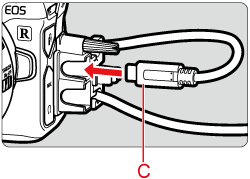
6. Plug the cord into the digital terminal.
C: Interface cable
IMPORTANT
- Connecting interface cable without using the cable protector may damage the digital terminal.
- Check that the interface cable is securely attached to the digital terminal.
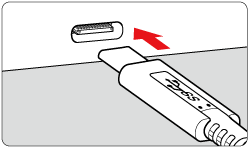
7. Connect the cord’s plug to the computer’s USB terminal.
NOTE
The location of the terminal varies by computer model. For more information on the location of the terminals on your computer, please refer to Advanced User Guide.
8. Set the power switch to <ON>.
- Communication between the camera and the computer begins.
- When the computer displays a screen to select the program, select [EOS Utility].
IMPORTANT
EOS R corresponds to EOS Utility Ver.3.9.0. and above. If you are using versions prior to EOS Utility Ver.3.9.0, install the latest version of EOS Utility, which can be downloaded from the Canon homepage.
NOTE
Windows:
EOS Utility Ver.3.9.0 or later will start automatically when you connect the camera to a computer.
Mac OS:
EOS Utility Ver.3.9.0 or later will start automatically when you connect the camera to a computer.
If EOS Utility is not displayed, click the [EOS Utility] icon in the Dock.
9. Before disconnecting the cable, turn off the camera. Hold the plug (not the cord) to pull out the cable.